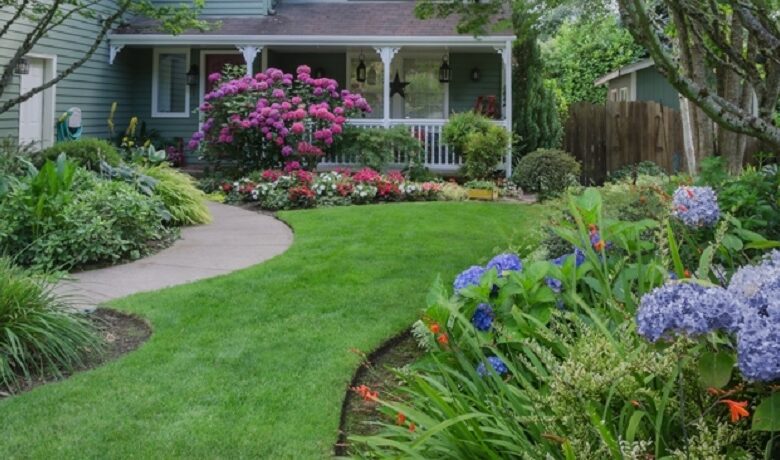
A well-defined lawn edge not only enhances the overall aesthetics of your landscape but also contributes to the health of your lawn. Proper edging creates a distinct boundary between your grass and flower beds or walkways, promoting a clean, manicured look. This guide will delve into the importance of lawn edging, explore various materials and techniques, and provide detailed steps to achieve beautiful lawn edges that will impress your neighbors and enhance your outdoor space.
Lawn health goes beyond mowing, and Grass Cutting Solihull emphasizes care techniques like aeration and fertilization. These additional services ensure Solihull lawns grow thick, green, and disease-free, complementing routine cutting with comprehensive lawn management.
Why Lawn Edging Matters
Creating a clear division between your lawn and garden beds, paths, or driveways serves several purposes:
- Aesthetic Appeal: Well-defined edges enhance the beauty of your garden, giving it a polished and professional appearance. They create visual interest and can serve as a focal point in your landscaping design.
- Weed Control: Proper edging can help prevent grass and weeds from encroaching into flower beds or other landscaped areas. This barrier reduces competition for resources, allowing your plants to thrive.
- Easier Maintenance: Lawn edging simplifies mowing and trimming. It provides a clear guide for where to cut, reducing the risk of damaging your plants or leaving unkempt patches of grass.
- Soil Conservation: Edging helps to keep soil in place, preventing erosion, especially on slopes or in areas prone to runoff.
Choosing the Right Edging Material
When it comes to selecting the right material for your lawn edging, several options are available, each with unique benefits:
- Steel Edging: Durable and long-lasting, steel edging offers a modern look that can withstand the elements. It is available in various heights and can be shaped to fit any design.
- Wood Edging: Wooden boards or logs provide a natural aesthetic and blend well with gardens. However, they may require maintenance over time to prevent rot.
- Stone Edging: Natural stone or pavers add elegance and a rustic charm to your landscape. They are highly durable but may require more effort to install.
- Plastic Edging: Lightweight and easy to install, plastic edging is an affordable option that comes in various colors. However, it may not be as sturdy as metal or stone.
- Brick Edging: Bricks create a classic look and are excellent for creating strong, permanent borders. They can be laid in various patterns for added visual appeal.
Tools and Materials Needed
Before starting your lawn edging project, gather the following tools and materials:
- Edging Material: Choose from the options above based on your preferences and budget.
- Shovel or Spade: For digging trenches to place your edging material.
- Landscape Fabric (optional): To prevent weeds from growing through.
- String Line: To mark the desired edge line.
- Level: To ensure the edging is installed evenly.
- Rubber Mallet: For securing materials in place without damaging them.
- Garden Gloves: To protect your hands during the process.
Step-by-Step Guide to Creating Lawn Edging
Step 1: Plan Your Design
Begin by deciding where you want to install your lawn edging. Consider the shape and flow of your garden beds or pathways. Use a string line to mark the desired edge, ensuring it is straight or curved as per your design.
Step 2: Dig the Trench
Using your shovel or spade, dig a trench along the marked line. The trench should be deep enough to accommodate your chosen edging material, typically 4-6 inches deep. The width of the trench will depend on the material’s dimensions, ensuring it fits snugly.
Step 3: Prepare the Base
For added stability, consider placing a layer of landscape fabric at the bottom of the trench. This fabric helps suppress weeds and allows for drainage, extending the life of your edging.
Step 4: Install the Edging Material
Place your chosen edging material into the trench, ensuring it is level with the surrounding soil. If using steel or plastic edging, you may need to secure it with stakes or spikes. For stone or brick, arrange the pieces tightly together, ensuring there are no gaps.
Step 5: Compact the Soil
Once the edging is in place, fill the trench with soil around the edges to secure it firmly. Use your foot or a tamper to compact the soil, ensuring the edging stays in position.
Step 6: Final Touches
After installation, clean up the area by removing excess soil and debris. If you’ve used wooden or brick edging, you may want to apply a wood preservative or sealant for additional protection.
Maintenance of Lawn Edging
To keep your lawn edging looking pristine, perform regular maintenance. This may include:
- Weeding: Regularly remove any weeds that may try to encroach on your garden.
- Cleaning: Use a broom or blower to remove grass clippings and debris from the edging.
- Repairs: Inspect for any loose or damaged sections and repair as necessary to maintain a neat appearance.
Conclusion
Creating beautiful lawn edging is a rewarding project that enhances both the aesthetic and functional aspects of your garden. By choosing the right materials and following a systematic approach, you can achieve professional-looking results that elevate your outdoor space. Whether you prefer the classic charm of brick, the durability of steel, or the natural beauty of wood, a well-executed edging design will transform your lawn into a stunning landscape that reflects your style and care for your home.